My Personal Cache – A Step-by-Step Guide
How to Bury Your Stuff: The Ultimate Step-by-Step Guide
Because no one can take what they cannot find
Take an empty 20 ounce Coca-Cola bottle, rinse and dry it out completely. Screw the lid on tight and alternate placing the empty bottle in the freezer, then outside on a hot summer day and back in the freezer again. Sooner or later, if you continue to do this, moisture will start appearing on the inside of the bottle. This is the exact same thing that can easily happen to all of your electronic circuit boards. To guard against this, I will be going through a step-by-step process and showing you exactly how I am caching my own external hard drive.
For this demonstration, I’m going to be copying my laptop’s files onto an external hard drive. I will then cache this hard drive at another location, but first I will be photographing the steps I am taking in order to show you the proper way to shield your electronics and digital devices from both condensation and electro-magnetic pulse.
In this photo, you can see my silver Seagate 1tb Backup Plus HDD.
 This Seagate HDD model has moving parts that may not withstand long-term exposure to moisture and extreme temperatures; so when burying hard-drives, it’s critical that one digs below the frost-line. When burying digital storage devices, it’s preferable to use an SSD (solid-state drive) whenever possible; they are expensive but also incredibly tough and able to handle many times the abuse.
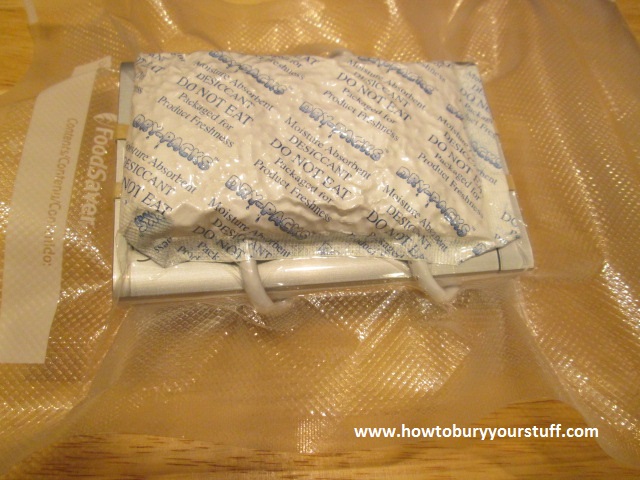
I have already saved my laptop’s important files (music, photos, vacation videos and a couple of my favorite films) to the HDD and then placed it inside a FoodSaver vacuum bag with two bags of desiccant.
 I then wrapped the FoodSaver bag with a cotton t-shirt for temperature insulation and placed the wrapped HDD inside an Outdoor Products brand dry box. These little things are great for water-sports, however after about 3 years the seals will start to dry-rot. So if you’re caching for several years, use all-purpose silicone around the seal. If you prefer, substitute a small Tupperware container in place of the dry box. You will still need to use all-purpose silicone to seal the lid and I would wrap it with half a roll of tightly-bound electrical tape for insurance.
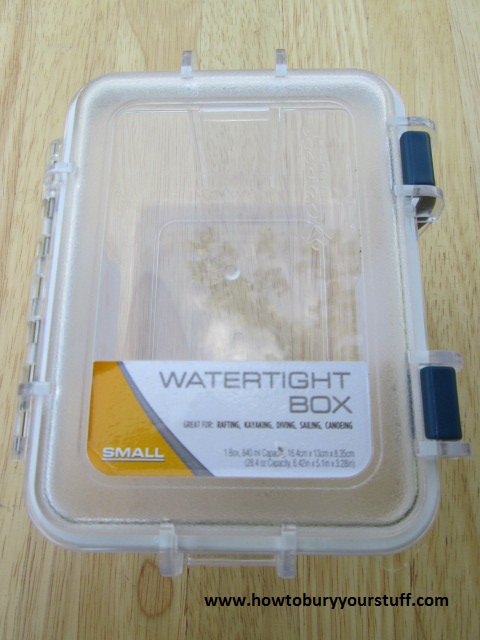
>> Click here to get current pricing and reviews from Amazon.com on Outdoor Products Dry Boxes <<
I now have a Seagate 1tb Backup Plus inside a sealed container made completely out of plastic and silicone, both of which are good electrical insulators. I want to shield my hard-drive from electro-magnetic pulse (EMP) so I’m going to construct what is called a Faraday Cage. I won’t go into details about how the Faraday works, there is plenty of data available elsewhere online. As you can see below, I’ve wrapped this plastic container with copper mesh, successfully shielding my HDD from electrical disturbances.
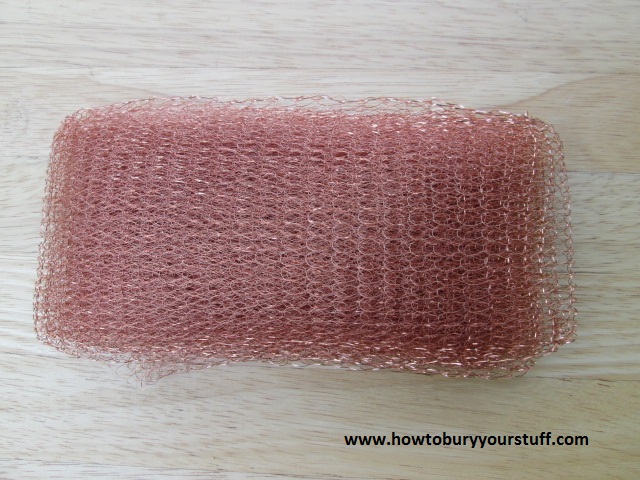
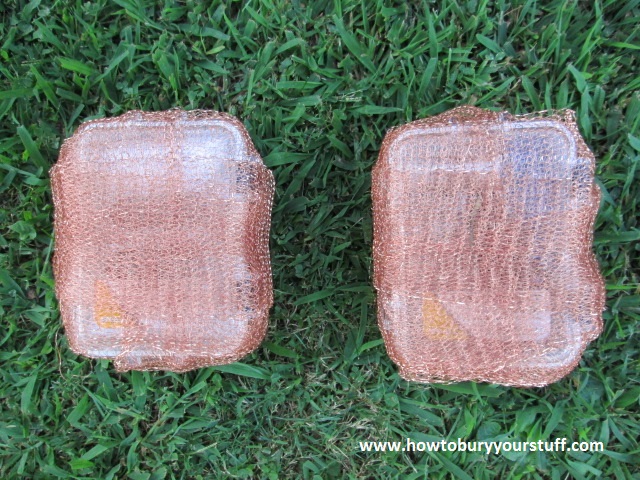
>> Click here to get current pricing and reviews from Amazon.com on Copper Mesh <<
At the last minute, I have decided to add several more items, including another Outdoor Products dry box to this cache. The second dry box contains an extra pair of reading glasses, a pocketknife and a few other personal items. I will be using sections of foam swimming pool “noodles” to keep the boxes evenly spaced while inside the tube. This practice maintains a good temperature buffer and also prevents damage during transport by holding everything inside the tube in place.
As you can see in the photo below, the two boxes and the styrofoam noodle “spacers” will only take up about two-thirds the length of the pipe. The remaining space will be used for a few more personal items; I’ll leave it to your imagination what they might be.
 I have taken both of my Outdoor Product dry boxes and placed them inside a section of 6-inch PVC sewer pipe. I’ve used epoxy resin to seal one end and petroleum jelly to seal the other; using a permanent marker to designate which end of the pipe can be opened and which cannot.
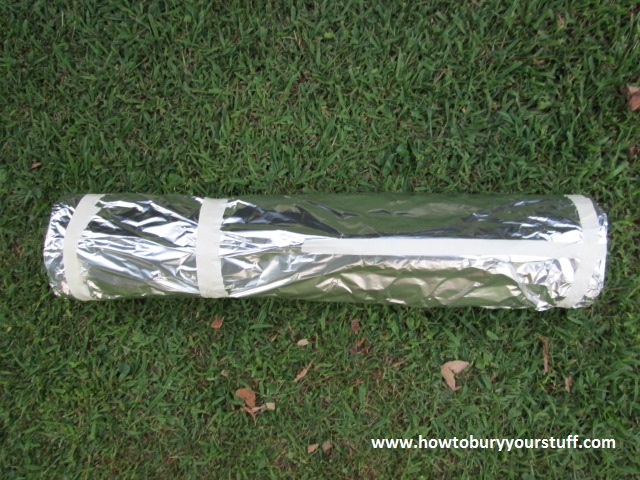
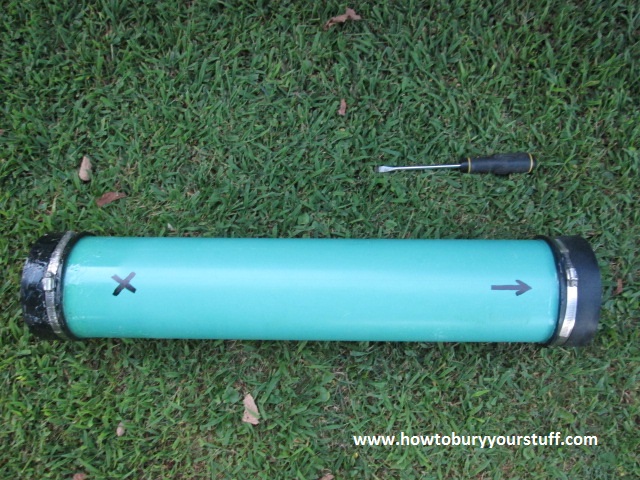 The “dead air” space inside the pipe acts as a second layer of insulation against rapidly changing temperatures and the pipe itself acts as a second water-proofing device. Since the pipe and endcaps are also electrical insulators, when I bury the pipe I will wrap it completely in heavy-duty aluminum foil to act as a second Faraday Box.
Remember to cut slits in the aluminum foil along the bottom of the pipe for drainage; the last thing you want is water pooling around your cache. I’m also using the aluminum foil to attach a flat screwdriver to one end of the pipe.
 Well, there you have it. I’ve done this more times than I could begin to count and I know that as sure as I sit here, that many years from now, this HDD can be safety retrieved in pristine condition. I plan to launch this website about a week or so after burying this cache near a cabin in the Daniel Boone National Forest. I’ll bury the pipe over the Labor Day holiday weekend on a ridgeline about 6 inches below the surface, exactly as it is shown in the above photo. Normally I would bury the pipe a minimum of 15 inches down (and I highly recommend that you do also) but I’m leaving this one shallow as part of an experiment.
With double redundancies insuring against water damage, electrical surge and condensation, I can rest easy; knowing that all of my digital data is securely protected against anything and everything.
Comments are currently closed.
NOW AVAILABLE!!!
 Support our site and get a printer friendly version of our Guides to print or view on your mobile phone or tablet where ever you go.
Also includes Bonus Information not found on our site.
-
Recent Posts
- Permanent caches: For the “Long Haul”
- What to Bury: A Guide for New Preppers
- How to Bury a Laptop – A Step-by-Step Guide
- How to Bury Food
- Guide to Military Surplus Ammo Cans
- Underground Fuel Storage
- Tricks and Tips for Caching
- My Personal Cache – A Step-by-Step Guide
- Helpful Links and Other Resources